

Introduction
Starting your makeup journey can feel like stepping into a whole new world. Brushes, palettes, different shades – it’s easy to get overwhelmed. That’s why a makeup tutorial for beginners emphasizes simplicity first. You don’t need every product under the sun; mastering a few basics will give you confidence and make the whole process less stressful.
Why Starting Simple Matters
Think of makeup like learning a new hobby. If you try to do everything at once – intricate eyeshadow, bold lips, contouring – it can quickly feel intimidating. Beginning with simple steps lets you:
- Understand your skin and how products behave
- Build confidence gradually
- Save time and money while learning what works for you
Starting simple also means you can experiment without feeling pressured. Even a fresh, natural look can make a big difference in your day-to-day life.
Table of Contents
Overcoming Common Beginner Fears
Many beginners worry about:
- Applying the wrong shade
- Making mistakes that are hard to fix
- Looking “overdone” or unnatural
Here’s the truth: mistakes are normal, and no one becomes a makeup pro overnight. Start with products you’re comfortable with, practice in good lighting, and remember – makeup is about enhancing your features, not hiding yourself. Try asking yourself, “What’s one small step I can master today?” – that mindset makes learning fun instead of stressful.
Essential Tools and Products
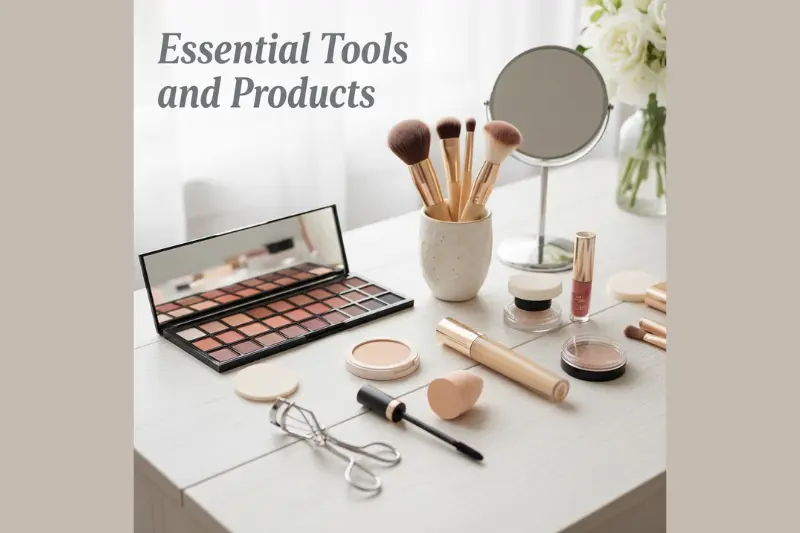
Before diving into a full makeup tutorial for beginners, it helps to gather the right tools. Having a few essential products and brushes makes your routine easier, faster, and more enjoyable. Don’t worry about having a massive collection – starting simple is better than being overwhelmed.
Must-Have Brushes and Applicators
Even a few well-chosen tools can make a huge difference:
- Foundation brush or sponge: For smooth, even coverage. Many beginners find a damp makeup sponge easier to blend than a brush.
- Blush/bronzer brush: Adds color and warmth to your face without overdoing it.
- Eyeshadow brush: A flat brush works for lids, while a blending brush softens edges.
- Multipurpose brushes: Some brushes can handle multiple steps, which is great for minimalists.
Mini Tip: Start with 3–5 brushes, and upgrade as you feel confident. Cleaning them regularly keeps your skin healthy and your makeup looking fresh.
Core Products Every Beginner Needs
You don’t need a full vanity to start – just these essentials:
- Foundation or BB cream: Evens out your skin tone. Pick a shade close to your natural skin for a subtle, polished look.
- Concealer: Covers dark circles or blemishes. A little goes a long way.
- Powder: Sets your base and reduces shine, especially for oily areas.
- Blush/Bronzer: Adds dimension and a healthy glow.
- Eyeshadow palette: Stick to neutral shades first – browns, beiges, or soft pinks are easiest to work with.
- Mascara: Opens up your eyes instantly; a beginner-friendly tool for an everyday boost.
- Lip color or tinted balm: Completes your look with minimal effort.
Pro Tip: You don’t need expensive brands. Drugstore options can give the same effect as high-end products, especially when you’re learning technique. Focus on practicing, not buying everything at once.
May be you like it:
Letterman Jacket Designs – Classic Meets Modern Style
Best Makeup Remover Oil for Clear, Radiant Skin
Luxury Fashion Trends 2022 – Elegance Redefined
Health and Wellness Newsletter – Your Weekly Life Boost
Skin Preparation
Before you even pick up a brush, your skin deserves a little care. A makeup tutorial for beginners isn’t just about applying products – it’s about creating a clean, healthy canvas so your makeup looks smooth and lasts longer. Think of it like painting on a primed surface: the better the base, the better the result.
Cleansing, Moisturizing, and SPF Basics
- Cleansing: Start with a gentle cleanser to remove dirt, oil, and leftover makeup. Fresh, clean skin helps products blend better and prevents clogged pores.
- Moisturizing: Even if you have oily skin, moisturizing is essential. It hydrates your skin, prevents flaky patches, and helps foundation glide on more evenly.
- SPF: Sun protection isn’t just for the beach. A lightweight SPF or moisturizer with SPF shields your skin from damage and premature aging.
How Prepping Affects Makeup Application
Skipping prep can lead to uneven foundation, patchy concealer, or makeup that melts off quickly. On the other hand, properly prepped skin:
- Makes foundation blend seamlessly
- Helps makeup last throughout the day
- Reduces the chance of cakiness or dry spots
Mini Example: Even a quick 5-minute routine – cleanse, apply moisturizer, and dab SPF – can dramatically improve your makeup’s finish. Beginners often notice a huge difference when they take the time to prep, and it makes the whole process more enjoyable.
Reflective Tip: Ask yourself, “Does my skin feel hydrated and smooth before makeup?” If yes, you’re already one step ahead.
Foundation & Base Techniques
One of the first steps in a makeup tutorial for beginners is mastering your base. Foundation evens out your skin tone and creates a polished canvas for the rest of your makeup. Getting it right doesn’t have to be intimidating – a few simple tips can make all the difference.
Choosing the Right Shade
Finding your perfect foundation shade is crucial. Too light or too dark can make your makeup look unnatural. A few beginner-friendly tips:
- Test shades on your jawline, not your hand. This matches your face to your neck.
- Natural lighting is your best friend – always check your match near a window.
- Start with a lighter coverage product like a BB cream or tinted moisturizer if you’re unsure.
Mini Tip: You can always build coverage gradually. It’s easier to add more than to take it away.
Application Methods: Sponge, Brush, Fingers
- Sponge: Damp sponges give a soft, airbrushed finish. Perfect for beginners who want a natural look.
- Brush: Foundation brushes are great for full coverage and precise blending.
- Fingers: Your warmth helps the product melt into the skin, especially for BB creams or tinted moisturizers.
Choose whichever method feels easiest – there’s no “wrong” way. Many beginners find combining techniques works best: a brush for areas needing coverage and fingers for blending around the eyes and nose.
Blending Tips for a Natural Look

- Start from the center of your face and blend outward. This prevents harsh lines around your jaw and hairline.
- Use gentle tapping motions with a sponge rather than dragging the product across your face.
- Don’t forget tricky areas like the sides of your nose, under your eyes, and along the jawline.
Pro Tip: Less is more. Begin with a small amount of product – you can always build up gradually. Natural-looking makeup often comes from careful blending, not layering too heavily.
Reflective Question: Have you ever noticed how blended foundation instantly makes your skin look smoother and brighter? That’s the magic of a well-applied base!
Concealing Imperfections
Even after a perfectly blended foundation, most beginners notice small blemishes, dark circles, or uneven spots. That’s where concealer comes in. In a makeup tutorial for beginners, learning how to conceal properly can instantly elevate your look without making it look heavy or artificial.
Spot Concealing
For pimples or redness, less is more. Dab a small amount of concealer directly onto the area and gently tap with your fingertip or a small brush. Avoid rubbing – it can remove the product and disturb your base.
Mini Tip: Let the concealer sit for a few seconds before blending to prevent it from sliding off.
Under-Eye Brightening
Dark circles are common, and brightening them gives your face a fresh, awake appearance. Apply concealer in a gentle triangle under your eyes rather than just a line. Blend lightly with a sponge or fingertip. This technique reflects light naturally and avoids a flat or dull look.
Avoiding Cakey Finishes
Beginners often worry about applying too much product. To prevent a cakey appearance:
- Apply thin layers and build coverage gradually
- Blend each layer fully before adding more
- Set with a light dusting of powder only where needed
Pro Tip: Using a hydrating concealer or adding a tiny bit of moisturizer under your concealer can help maintain a natural, dewy finish.
Reflective Question: Next time you spot a blemish, think – can a few well-placed taps of concealer give me a flawless finish without piling on layers? Often, the answer is yes!
Setting and Highlighting
After foundation and concealer, the next step in a makeup tutorial for beginners is setting your base and adding subtle dimension to your face. Proper setting and highlighting can make your makeup look polished and last longer – without feeling heavy or unnatural.
Powder Techniques to Prevent Shine
Even a beginner can avoid midday shine with a few simple tips:
- Focus powder on your T-zone – forehead, nose, and chin – where oil tends to build up first.
- Use a light hand; tap off excess powder before applying.
- Try a translucent or lightweight powder for a natural finish that doesn’t look dry or cakey.
Mini Tip: If your skin is on the drier side, mix a tiny bit of powder with your foundation or use a damp sponge to prevent a matte, flat look.
Simple Ways to Highlight and Contour for Beginners
Highlighting and contouring don’t have to be intimidating. Start small:
- Highlight: Apply a subtle shimmer or lighter shade to the tops of your cheekbones, bridge of your nose, and brow bone. It reflects light and gives a fresh, lifted look.
- Contour (Optional): A light bronzer along your cheekbones, jawline, and sides of your nose adds natural dimension. Don’t overdo it – soft blending is key.
Pro Tip: Beginners often see the most improvement by focusing on just one or two areas to highlight, rather than trying to contour the entire face. Less is more, and you’ll get a natural glow without looking overdone.
Reflective Question: Have you ever noticed how a tiny swipe of highlighter instantly brightens your face? It’s amazing how small touches can make a big difference.
Eye Makeup Basics
Eyes are often the focal point of any makeup look, and in a makeup tutorial for beginners, learning simple eye techniques can make a huge difference without feeling complicated. Starting with neutral shades and mastering basic blending and mascara can instantly enhance your features.
Neutral Eyeshadow Application
For beginners, neutral shades like beige, soft brown, or taupe are your best friends. They’re forgiving and versatile for everyday looks. Start by applying a light shade all over your lid as a base. Then, add a slightly darker shade to the crease to create subtle depth.
Mini Tip: Choose shades close to your natural skin tone for the easiest, most natural results.
Blending for Depth
Blending is the key to professional-looking eyeshadow. Use a soft, fluffy brush to sweep the darker shade gently back and forth in the crease. Avoid harsh lines – think of it like smudging lightly to create a soft gradient.
Pro Tip: Less pressure and slow, small motions make blending much easier for beginners. You can always add more color later if needed.
Mascara Tips to Open Up Eyes
Mascara can make your eyes look wider and brighter instantly. A few beginner-friendly tips:
- Wiggle the wand at the base of your lashes for lift, then sweep upward.
- Focus on the outer lashes to create a subtle “cat-eye” effect without eyeliner.
- Avoid overloading the wand; one or two coats is usually enough for a polished, natural look.
Reflective Question: Have you ever noticed how just a touch of mascara can make you look more awake and confident? It’s one of the easiest ways to enhance your features in seconds.
May be you like it:
Vintage Jackets for Women – Timeless Retro Style
Makeup Looks for Wedding – Elegant & Timeless Styles
Trends in Fashion 2014 – The Styles That Ruled the Year
Lifestyle Baseball – Where Sport Meets Everyday Style
Blush, Bronzer, and Color Balance
Adding color to your face is one of the most satisfying steps in a makeup tutorial for beginners. The right blush and bronzer can give your skin a healthy glow and add dimension – but applied incorrectly, they can look harsh or unnatural.
Placement Tips for a Natural Glow
- Blush: Smile and apply color to the apples of your cheeks, then blend slightly upward toward your temples. This creates a natural, lifted effect.
- Bronzer: Lightly sweep along your cheekbones, jawline, and forehead edges. Keep it soft and build gradually – think of it as adding warmth rather than creating strong lines.
- Mini Tip: Always blend, blend, blend. Harsh edges are the quickest way to make makeup look “overdone.”
Balancing Colors for Your Skin Tone
Different skin tones respond better to certain shades:
- Fair skin: Soft pinks, peaches, and light bronzers
- Medium skin: Warm peaches, rosy pinks, golden bronzers
- Deep skin: Rich berry tones, deep bronzes, and warm caramel shades
Pro Tip: When in doubt, go lighter rather than darker. You can always layer for intensity, but removing excess color is trickier.
Reflective Question: Have you ever noticed how the right blush instantly makes your face look more awake and healthy? It’s amazing how subtle color can transform your look without adding complexity.
Lips Made Simple

Finishing your look with lips doesn’t have to be intimidating, even in a makeup tutorial for beginners. The right lip products and a few simple techniques can instantly pull your whole look together.
Lip Balm, Lipstick, and Gloss
- Lip Balm: Always start with a hydrating lip balm. It smooths out dryness and helps color apply evenly.
- Lipstick: Choose shades that complement your skin tone. For beginners, nudes, soft pinks, or corals are versatile and easy to wear.
- Gloss: A touch of gloss on the center of your lips can make them appear fuller and fresh.
Mini Tip: You don’t need all three every day – sometimes balm plus a bit of lipstick is enough for a polished, natural look.
Quick Tricks for Precise Application
- Start in the center of your lips and work outward for an even coat.
- Use a lip brush for more control if you’re trying a bold color.
- Blot lightly with a tissue after applying to prevent smudging and help it last longer.
Pro Tip: Beginners often worry about going outside the lip line – a quick swipe of concealer around your lips can clean edges and give a crisp finish.
Reflective Question: Have you noticed how a swipe of your favorite lip color can instantly boost your confidence? Sometimes, the simplest step makes the biggest difference.
Tips, Tricks, and Common Mistakes
Even after mastering the basics, beginners often wonder how to make their routine easier, avoid frustration, and keep their tools in top shape. In this makeup tutorial for beginners, a few practical tips can save time and help you feel confident every day.
Time-Saving Shortcuts
- Minimalist routine: On busy mornings, focus on foundation, mascara, and a lip balm or lipstick – you’ll look polished in minutes.
- Multi-use products: Cream blush that doubles as lip color or tinted moisturizer with SPF can simplify your routine.
- Prepping in advance: Organize your makeup station or keep daily essentials in a small kit for quick access.
How to Practice Without Frustration
- One step at a time: Focus on mastering one technique (like blending eyeshadow or applying concealer) before moving to the next.
- Use good lighting: Natural light helps you see mistakes clearly and ensures your colors look true.
- Practice playfully: Treat mistakes as learning opportunities rather than failures. Even pros have off days!
Cleaning and Maintaining Tools
- Brushes and sponges: Clean them at least once a week to prevent bacteria buildup and uneven makeup application.
- Products: Check expiry dates, especially for liquid foundations and mascaras. Old products can irritate skin.
- Storage: Keep brushes upright and makeup in a dry, cool place to maintain quality.
Mini Reflection: A little routine, a few shortcuts, and proper care go a long way in keeping makeup stress-free. Remember, a makeup tutorial for beginners isn’t just about the look – it’s about enjoying the process and building confidence gradually.
FAQs
How long does it take to do a beginner-friendly makeup look?
A simple everyday look can take around 10–20 minutes, depending on your comfort level and practice.
Do I need expensive products to get good results?
Not at all! Drugstore products can work just as well as high-end ones, especially when you’re learning techniques.
How can I prevent foundation and concealer from looking cakey?
Apply thin layers, blend well, and set only where needed with a light powder. Moisturizing beforehand helps too.
What’s the easiest way to make eyeshadow look natural?
Stick to neutral shades and blend carefully using soft, small strokes – it’s the simplest way to look polished without overdoing it.
How often should I clean my brushes and sponges?
Once a week is ideal to prevent bacteria buildup and keep your makeup application smooth and hygienic.
Conclusion
Learning makeup doesn’t have to feel intimidating. A makeup tutorial for beginners shows that starting simple, practicing small steps, and using the right products can make a huge difference. From prepping your skin to applying foundation, blending eyeshadow, and finishing with lips, each step builds your confidence and skill.
Remember, makeup is about enhancing your natural beauty, not hiding it. Mistakes are part of learning, and every practice session brings you closer to a look that feels uniquely yours. Take your time, enjoy the process, and celebrate small wins – soon, creating a polished, everyday look will feel effortless and fun.
May be you like it:
DST Jackets – Trendy Designs for Every Season
Makeup 50s – Timeless Beauty Trends That Still Inspire
latest trends in fashion for ladies 2025 hamptons
Lifestyle at Los Paseos – Modern Living & Community Vibes